Top 10 Plastering Tips
DIY Plastering tips for stress free plastering!
For all Aspects of Plastering
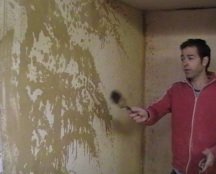
1. Prepare & Control the Suction
Control the Suction - if the wall is too dry the moisture will be sucked out of the plaster you apply and it will become too firm to work properly. This applies to both the backing coat & the skim coat.
Backing Coat Plastering Tips
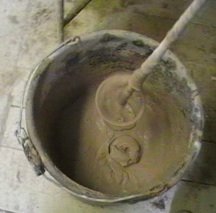
2. Using a Sand based backing coat.
Sand & cement (with plasticiser) can give many advantages for the beginner:
- gives you all day to work with it - it sets overnight so no time pressure.
- is easier to float - so if the ruling off with the straight edge still leaves holes or leaves the surface uneven - the float will take care of it.
3. Apply Two Coats
A very thin 1st coat – just to ensure it sticks and is properly pushed into the wall with lots of pressure.
This ensures it will not fall off later, and allows the 2nd coat to be applied - with just enough pressure to ensure you apply the correct thickness, and to keep it reasonably flat. (If you're having to push hard to get the plaster to stick to the wall - it is difficult to concentrate on these aspects).
Make sure the 1st thin coat is still wet and pliable when you do apply the 2nd coat, and you may be surprised just how little pressure you need. Just 1st coat a little ahead of the 2nd coat, or really make sure the suction is controlled so it does not dry too quickly.
A 2nd coat can be applied as thick as need be - with less pressure, but just enough to keep it flat.
4. Keep it Flat
Always make sure you are aiming for flatness - not smoothness! There is a tendency with us all to play around with the backing coat smoothing it out - but it really doesn't matter how smooth it is; it just needs to be flat as the skim coat will do the job of smoothing far better. if the backing coat is not flat - it will be very hard to obtain a smooth finish.
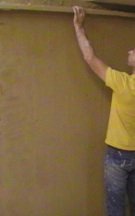
Corners
If you do nothing else make sure all corners are totally flat and the whole wall will look good.
Internal corners the right & left corner should be totally flat when a straight edge is held up vertically The top & bottom should be flat when a straight edge is held horizontally
External corners ensure all angle beads are straight and line up with surrounding walls or frames.
5. Cut back
Really simple to do and provides a quick check of everything. Just run a totally flat trowel over a wall that has firmed up at the end of the day or before the finish coat. (never do this when plaster is soft). Ensure the corner of your trowel runs right to all adges and trims off any small bulges of plaster right into the corner by slightly cutting into the adjacent wall or ceiling with the blade of your trowel.
Skim Coat Plastering Tips
*Don't forget Plastering Tip 1 applies to skimming and is probably the most important.
6. The Right Trowel
If the trowel is not very good then neither will the finish be.
7. Make it thin
Don't mix the finish plaster too thick otherwise it will be very difficult to keep it flat and your arm will ache trying to spread it out. It should be thin enough so that it peaks and is like a thick yoghurt. It will then spread with less effort to give a flat coat no more than 2mm thick.
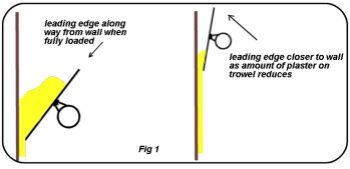
8. Trowel Angle
One of the most important plastering tips ...
10 mm on the leading edge will flatten - when combined with firm pressure. Increasing this angle more than 10 mm from the wall, and the trowel will start to scrape the plaster away.
Not good if you just want to fill a few holes as you will risk scraping the plaster to the lowest level and risk the backing coat showing through.
Only good if you have any bulges or thicker areas that require flattening.
9. Push Hard!
Firm pressure on the trowel to ensure the plaster is flat with no bulges. Loads of pressure combined with the correct angle of your trowel. This will push the plaster across the whole length of your trowel and therefore be forced into any holes.
10. Flatness, Holes then Trowel Marks
Remember this order and all should work out. Flatness to always ensure your trowel is sitting flat on the wall then before it firms up too much get the holes filled by applying firm pressure or getting more plaster in the hole and smoothing out. Then when the plaster is quite firm, any trowel marks and ridges will be successfully smoothed out - providing you have kept it flat allowing your trowel to sit flat on the wall.