How to Plaster over artex
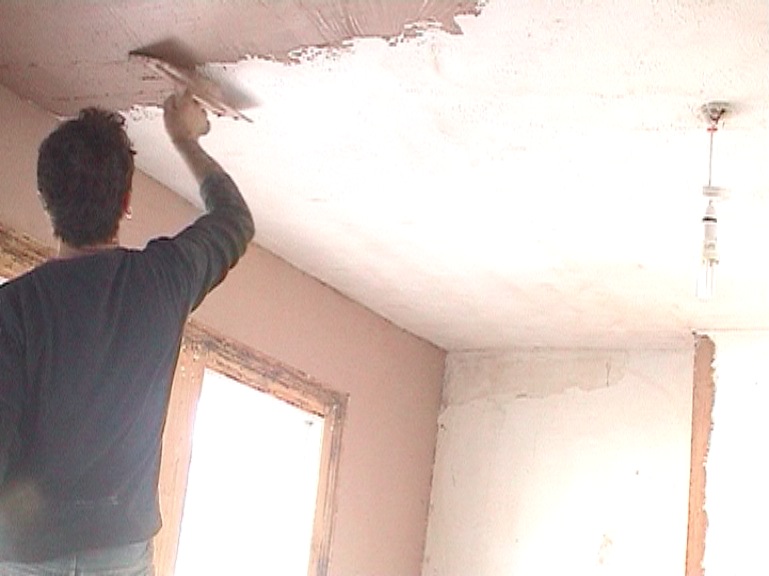
The how to plaster over artex video clip below shows a ceiling - but a wall would use exactly the same method.
Plastering over artex is no different to normal plastering - but it is one of the hardest aspects of skimming.
First you need to decide if it will be easier to first apply a base coat. If the highest point of the artex is 5-10mm then it will be easier to apply a base coat of 'Bonding Coat' to the surface.
 plaster over artex ceiling
The 3 options to plaster over artex
The video below shows how to plaster over artex - that has highs of about 5mm, so I chose to not apply a base coat and instead apply two thick coats of finish as normal. However it was borderline as to whether the two coats would cover, in this case it did work but if not a 3rd coat would be needed.
So as you can see - there are 3 options:
- 2 coat skimming process as normal (slightly thicker coats than normal skimming though)
- 3 coat shimming process (just repeat stage 1&2)
- Apply a Base Coat prior to skimming as normal (applied as below)
As a very rough guide Option 1 could be used where the high points are less than 5mm, Option 2 can be used if Option 1 proves not to work, Option 3 where high points are greater than 5mm
A base coat using Bonding Coat
Apply the Bonding Coat just as you would apply the skim coat (stage 1 of the skimming process) and then really important to carry out stage 2 of the skimming process as it firms up. As the Bonding Coat firms up and sets you will need to flatten it off to ensure there are no trowel marks or bulges left protruding - if anything is sticking out more than 2 mm - flatten it off)
The skimming process can then be carried out as normal.
How to Plaster Over Artex quick video clips of 1st & 2nd coat
PVA had first been applied to the whole ceiling. The ceiling was white, making it difficult to see where I had applied the PVA - so I added a handful of plaster to the PVA dilution to turn it pink.
The ceiling had been previously painted with a vinyl paint and was not at all porous, so 1 coat of PVA was sufficient.
The first part of the video shows the 1st coat being applied - this is just a quick coat applied to bring the plaster out to the highest points.
It will look very rough - but it is pointless in wasting time playing around with it as it will soon all be covered with a second coat. Keep reminding yourself that you have another 5 stages at least - to get it looking better - this first coat is literally to obtain a flatter surface - nothing more.
The high points of the artex will still be sticking out - but don't worry too much.
The trowel angle will have an effect - the flatter it is the more the plaster will be applied flatter - the more of an angle (the leading edge of the trowel being along way off the wall) the more liable that the highs will protrude.
Later on in the video you see the 2nd coat being applied - this is a lot thicker than it would be on a normal surface due to needing to cover all the high points of the artex.
It is often when you start
this coat that you know if a third coat will be needed. In this case it
would have been just as easy to do a 3rd coat, as I was having to put
quite a bit on for the second coat, and then being very careful not to
scrape it all off by having the wrong angle of my trowel. Notice the
trowel angle is quite flat in the video - in order to apply a slightly thicker, flat coat.
Once this second has been applied then the troweling stages (3-6) are exactly the same as normal.
Avoiding blisters and controlling the suction
To avoid blisters forming ensure the previous coat of plaster has firmed up enough. If using a base coat plaster such as Bonding Coat then it will need to set before you apply the finish coat. As the Bonding Coat firms up and sets you will need to flatten it off to ensure there are no trowel marks or bulges left protruding - if anything is sticking out more than 2 mm - flatten it off)
The plaster can then set and be skimmed the same day or another day. If you are leaving it for another day - it may need damping down with water - otherwise the suction could be too great and you will not have time to work the plaster before it dries. If in doubt flick some water onto the surface you're about to plaster - if it dries quickly then you will need to control this suction
Water or PVA can be applied to the surface to control the suction. If you do this when it didn't need it - the worse that can happen is the plaster takes longer to firm up. If you don't control the suction when it did need it - the worse that can happen is - disaster - it may all dry and become unworkable too quickly!