Plastering Made Easy
Plastering made easy with a few simple tips:
The Backing Coat
Easy ways to improve your plastering technique.
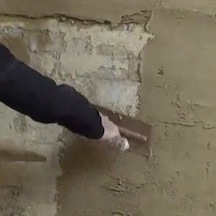
Your trowel is only an applicator
View your trowel only as a tool to put the correct thickness of plaster on the wall. Do not try and get the plaster really flat with your trowel – the straight edge will do this – but the straight edge cannot flatten something that is too thin. Your trowel needs to get roughly the correct thickness (aim for (+/- 5mm) and then your straight edge will do the rest.
Straightness with a straight edge not the trowel
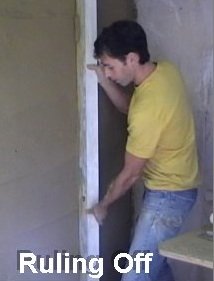
The straight edge will flatten the wall to within about 90% of the finish. The remainder will happen with the float – but only when it has firmed up enough. If the plaster is too wet there is a risk that the float can push the plaster out of shape – so floating can commence when the plaster cannot be pushed out of shape but is still pliable enough to flatten the corners and any other areas.
Differences of more than 5mm?
All walls need a base coat - unless they have been plastered before or consist of plasterboard.
In these instances the finish coat plaster can be applied directly to these surfaces* as they will generally be flat enough and not too porous
However every surface - including plasterboard will need a base coat if the highs are more than 5mm. If the undulations or differences of any surface are more than 5mm then it will be hard to achieve a nice smooth surface due to the thicker areas taking longer to firm up and resulting in a wall that is not uniformly drying and firming. This means the thinner areas of the wall could be at stage 6 whereas the thicker and wetter areas may be at stage 3.
A base coat should be applied that will level out the differences so there is nothing greater than 5mm.
If there are differences of more than 5mm then your skimming technique will need to be very good!
* The previously plastered surface may be too smooth and lack a physical key in which case PVA will be required for adhesion and if also porous to control the suction.
Effective Short Cuts using backing coat techniques
Using Backing Coat techniques
A full base coat as shown in the videos using guides is ideal if you have an entire wall that needs base coating However in some renovation works particularly with bathrooms and kitchens - a lot of the base coat may be present or only partially damaged.
In which case you don't need to go to the full extent of using guides but just roughly apply base coat plaster with your trowel (Bonding Coat can is ideal for this purpose) the required thickness in differing areas - don't play around with it and flatten too much with your trowel - get yourself a straight edge and lightly run this over in a horizontal and vertical way and scrape off the highs. Where the straight edge has not touched - add a bit more plaster with your trowel and run the straight edge over again. Repeat until flat.
This should be quicker and more effective on previously plastered walls that are crumbling and in a bad state of repair.
To recap - a full base coat is needed for entire brickwork & blockwork walls but for walls that are 'a bit of this and that' then the base coat application can be adapted as necessary.
Using Skimming Techniques
Rough textured surfaces
On surfaces that are fairly uniformly rough or textured such as artex - where the differences are more than 5mm and too much to apply the skim coat to directly - a base coat will be needed, but again not a full base coat using guides.
Instead a base coat (Bonding Coat) can be applied, but the technique to apply it will be the same as for skimming. This means that you will do Stage 1&2 firstly with bonding coat and then repeat them - and carry out Stages 1-6 again as normal. (Stage 1, Stage 2, Stage 1, Stage 2, Stage 3, Stage 4, Stage 5, Stage 6)
Marginally uneven surfaces
For walls that just have the odd defect - these can often be sorted out by packing out and levelling just prior to starting the skimming process: as soon as you have mixed your plaster, pack out all areas that need it and then start the skimming process as normal. At least these minor defects are packed out and the plaster has a chance to firm up a bit quicker on these thicker areas.
This also works well on plasterboard joins - where if there is a small gap of just 1 or 2mm between plasterboards - the finish plaster has a tendency to sag out due to the extra thickness and lack of any surface behind in which to suck the moisture out. As soon as you have mixed the plaster - a small amount can be pushed into the joins (that have already had scrim tape over to stop cracks) and any surplus wiped off with your trowel. This can be carried out to all joins in the wall prior to starting the skimming process.
Don't Apply the Skim Coat to an unset base coat
This is the sure way to get blister!
On small areas - particularly patching there can be a temptation to get it finished and apply the skim coat when the base coat al;though firm may not be set. This will invariably mean that blisters will form - which can be dealt with but always best avoided.
More Plastering Made Easy